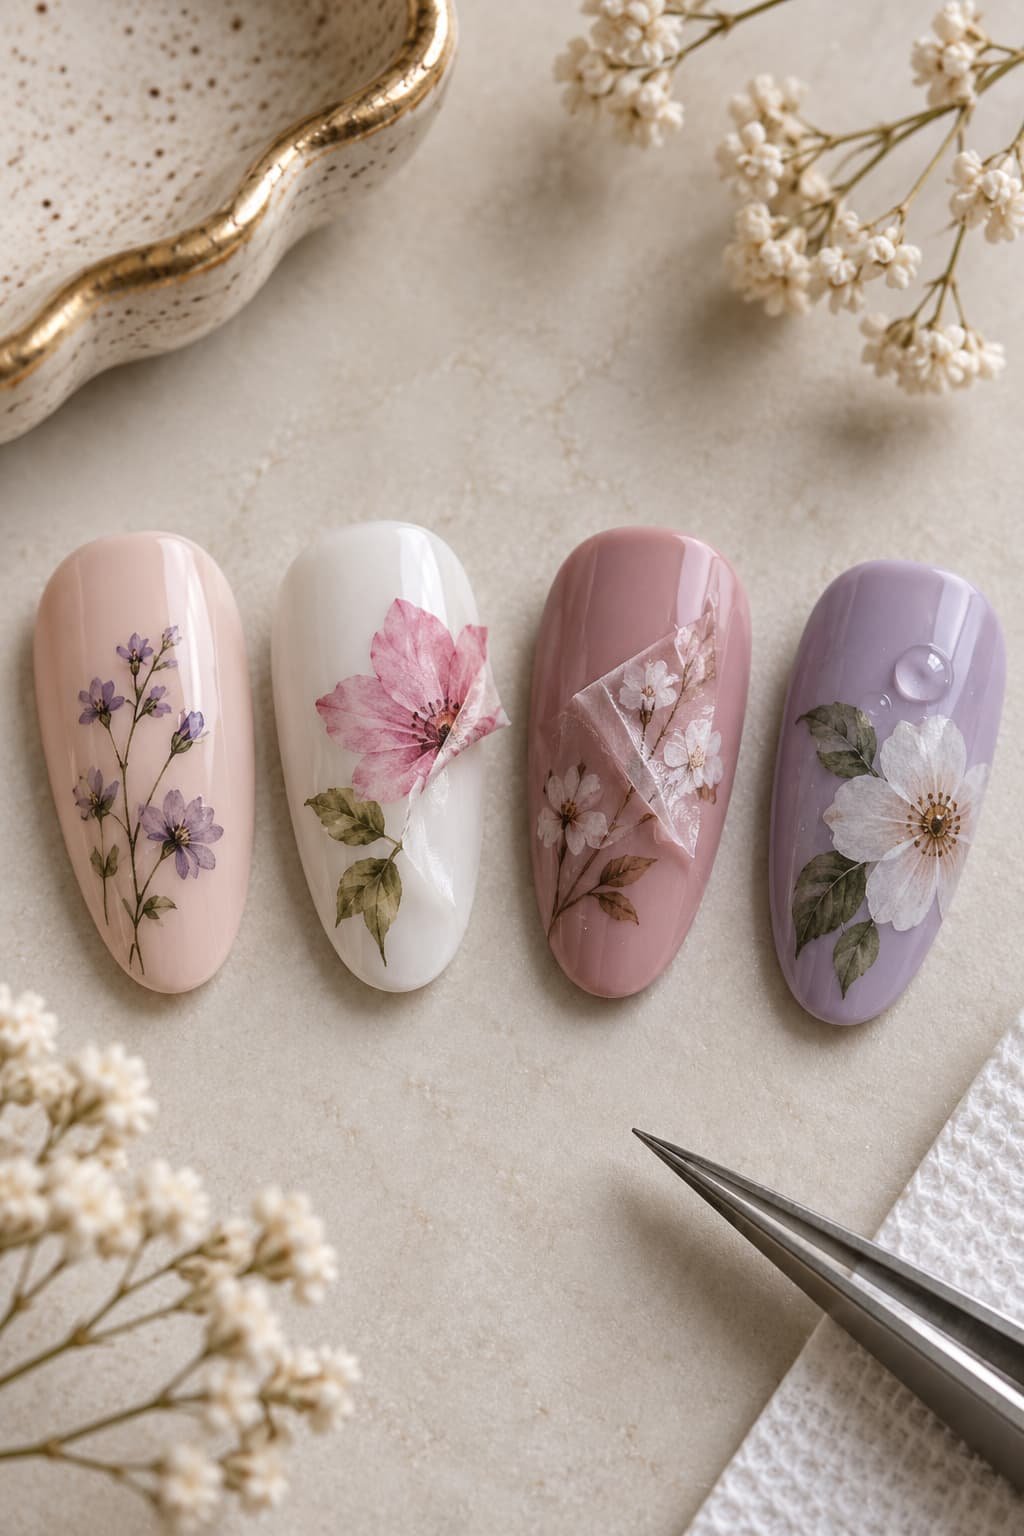
Nail art decals offer a way to add patterns, illustrations, and decorative details to a manicure without painting every element by hand. Depending on the product, a decal may be transferred with water or placed directly onto the nail using an adhesive backing.
The term nail art decals is used broadly for different decorative nail transfers and stickers. Product names are not always consistent, so the application instructions are important when identifying how a particular design works.
This guide explains the main types of nail decals, their application methods, design options, placement considerations, and common application problems.
What Are Nail Art Decals?
Nail art decals are decorative designs made to be transferred or attached to the nail surface. They may feature flowers, stars, lines, fruit motifs, abstract patterns, seasonal artwork, geometric details, or larger illustrations.
Some decals are small enough to work as a single accent. Others cover a larger section of the nail and become the main visual feature.
The final appearance can vary depending on the decal, base colour, nail length, nail shape, finish, and placement.
How Nail Art Decals Work
A nail decal places a prepared design onto the nail instead of requiring the complete image or pattern to be painted manually.
How the design reaches the nail depends on the product.
A waterslide nail decal uses water to release the printed design from its backing material. The released design can then be positioned on the nail.
A self-adhesive decal or sticker already has an adhesive surface and is generally peeled from its backing before being placed onto the nail.
Many systems also use a compatible clear or top layer after placement. The exact finishing method can vary according to the decal and manicure system.
Nail Decals vs Nail Stickers vs Nail Wraps
The terms nail decal, nail sticker, and nail wrap are sometimes used interchangeably, but they can describe different products.
Waterslide decals are usually printed transfers that need water to separate the decorative layer from its backing.
Nail stickers are commonly self-adhesive designs that can be peeled from a sheet and placed directly onto the nail.
Nail wraps usually cover a larger part of the nail, and some are designed to cover most or all of the visible nail surface.
These terms are not used consistently by every seller. Checking the product format and application instructions is more useful than relying on the name alone.
Main Types of Nail Art Decal
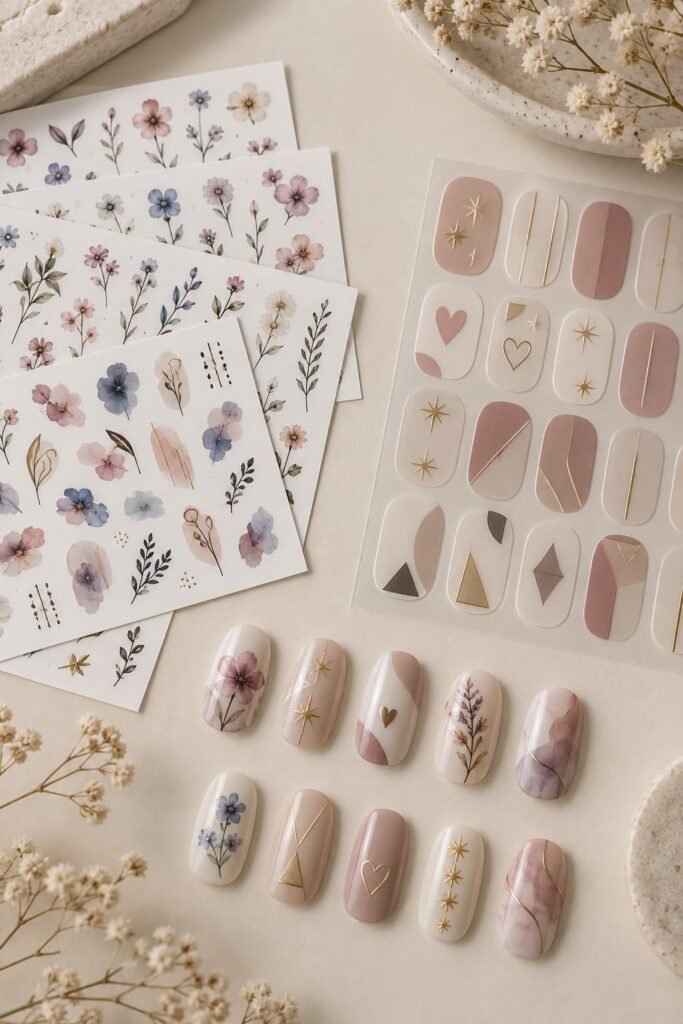
Nail decals can differ by transfer method, size, material, and the amount of nail surface they cover.
Understanding the basic types can make it easier to choose a design that fits the intended manicure.
Waterslide Nail Decals
Waterslide decals are printed designs that use water to release the decorative layer from a backing material.
The selected design is generally separated from the larger sheet before being prepared according to its instructions. Once released from the backing, it can be positioned on the nail.
Waterslide decals can be thin, so some may sit close to the surface and create the appearance of a printed detail rather than a raised decoration. Thickness and finish can vary between products.
Base colour can also affect the design. A decal printed partly on transparent material may appear different over white, nude, pastel, bright, or dark polish.
Looking for waterslide nail art designs? You can browse waterslide nail decals on Amazon.
Self-Adhesive Nail Decals
Self-adhesive nail decals work more like traditional stickers.
They are removed from a backing sheet and placed directly onto a prepared nail or manicure surface.
Possible designs include flowers, hearts, stars, lines, metallic-looking details, geometric shapes, and other small decorative elements.For peel-and-stick options, you can browse self-adhesive nail art stickers on Amazon.
The thickness and flexibility of adhesive designs can vary. Some may sit close to the nail, while thicker decorative pieces can remain more visible.
Placement can also change the overall look. One decal can create a small accent, while several designs can create a more detailed manicure.
Small Accent Decals and Larger Nail Designs
A decal does not need to cover the whole nail.
Small accent designs may include a flower, leaf, heart, star, line, symbol, or abstract shape. They can be placed on one nail or repeated across several nails.
This approach may suit someone who wants the base colour to remain a strong part of the design.
Larger decals can cover more of the nail and may contain floral arrangements, illustrations, layered patterns, or decorative artwork.
Nail size should be considered when choosing between smaller and larger designs. A decal that fits comfortably on a longer nail may need different positioning on a shorter surface.
How Are Nail Art Decals Applied?
There is no single application method for every nail decal.
Waterslide transfers and self-adhesive designs work differently, and individual products can have their own preparation and finishing requirements.
The following steps describe common approaches rather than replacing product-specific instructions.
Preparing the Nail Surface
A smooth, prepared surface can make positioning a decal easier.
If regular nail polish is being used as the base, it generally needs to be sufficiently dry for the chosen decal system before the design is placed over it.
Gel products follow their own curing process. Any curing instructions should come from the specific gel product rather than from general nail-decal guidance.
Base colour is another consideration. Transparent or lightly coloured artwork may appear more visible over some pale backgrounds, while dark polish can change the way certain colours and transparent sections look.
Available nail space also matters. A design that extends beyond the nail may need to be trimmed if the product allows it, or a smaller decal may be a better fit.
Applying Waterslide Decals
Waterslide decals need water to release the design from the backing.
The selected image is generally separated from the sheet first. How closely it should be trimmed can depend on the product.
The decal is then prepared with water according to its instructions. Once the decorative layer releases from the backing, it can be transferred to the nail.
Tweezers may make a small transfer easier to handle. Thin decals should still be positioned carefully because folding can affect their appearance.
After placement, excess moisture is commonly removed gently so the decal can sit closer to the surface.
The design should lie as evenly as possible before the finishing steps are completed. Folds, trapped moisture, or material extending beyond the nail edge can affect how the finished decal looks.
Specific soaking or drying times should come from the individual product instructions rather than a universal rule.
Applying Self-Adhesive Decals
Self-adhesive nail decals do not normally need water for transfer.
The design is removed from its backing and positioned on the prepared nail.
Small decals may be easier to handle with tweezers, particularly when they contain fine lines or narrow edges.
Once the placement is chosen, the design can generally be pressed gently against the surface according to its instructions.
Placement can vary. A small decal might sit near the base, side, centre, or tip of the nail. Several small motifs can also be arranged together for a more detailed effect.
Larger adhesive designs need enough space to fit the nail. If a decal is designed to be trimmed, its instructions should explain how excess material is handled.
Sealing the Finished Design
Many nail decal systems include a compatible clear or top layer as part of the finishing process.
The finishing layer may help cover the design and create a more unified-looking surface. However, requirements vary between products and manicure systems.
Regular polish, gel polish, acrylic nails, and press-on nails can have different finishing methods.
If gel products are involved, their curing instructions should be followed exactly as provided for those products. A general nail decal article should not be used to determine a curing time.
Nail Art Decal Design Options
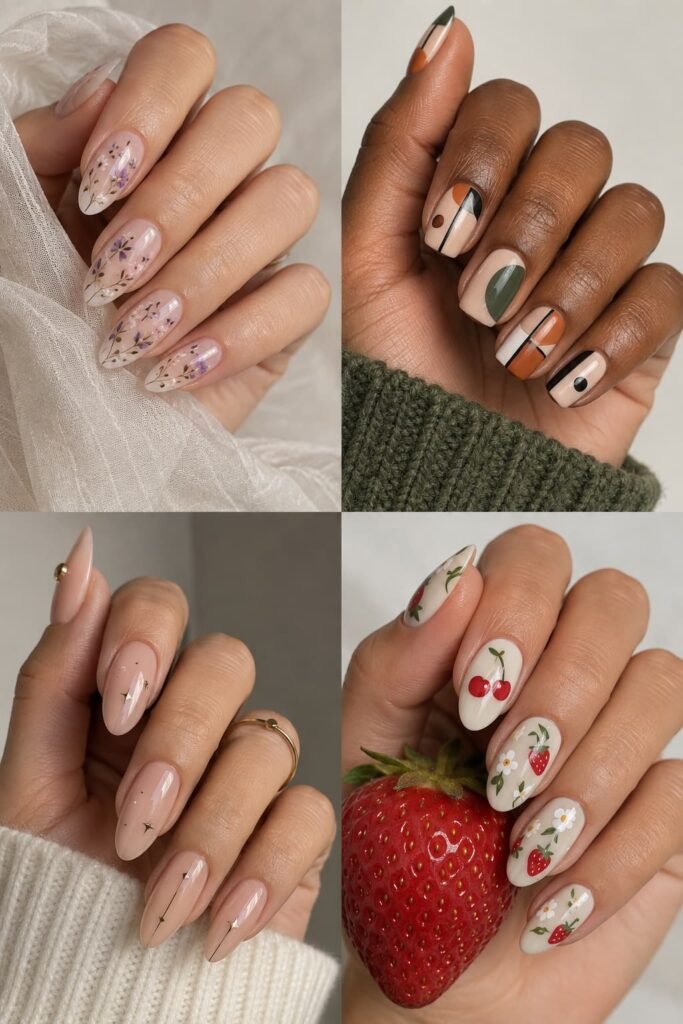
Nail art decals can range from very minimal accents to detailed illustrations.
The design does not need to be repeated in the same way across every nail. Size, placement, colour, finish, and the number of decals can all change the overall appearance.
Floral, Botanical, and Fruit Decals
Flowers, leaves, vines, cherries, strawberries, and other botanical or fruit-inspired motifs can add illustrated details to a manicure.
One small flower or fruit motif may create a simple accent. A group of related designs can create a more decorative arrangement.
Readers interested in fruit-inspired artwork can also explore Red Fruit Nail Art for additional strawberry and cherry design ideas.
Geometric and Abstract Decals
Lines, curves, grids, circles, blocks, and irregular shapes can create a more graphic style.
A single geometric decal can work as an accent, while several coordinated shapes may create a more detailed pattern.
The base colour can remain visible around the design, or multiple decals can cover a larger part of the nail.
Minimal Accent Decals
Minimal nail art usually relies on fewer decorative details.
One small star, heart, flower, line, or symbol can be placed on selected nails while the rest of the manicure remains simple.
A soft base colour can keep attention on the small decal. Neutral gradients can also provide a subtle background. For related colour inspiration, see Natural Ombre Nails.
Decorative and Seasonal Motifs
Decals may also feature seasonal or occasion-inspired artwork such as snowflakes, bows, stars, hearts, leaves, or festive illustrations.
These designs can be used as small accents or combined into a more detailed manicure.
A seasonal theme is a styling option rather than a requirement. The same placement approach can also be used with non-seasonal artwork.
How Nail Shape and Length Can Affect Decal Placement
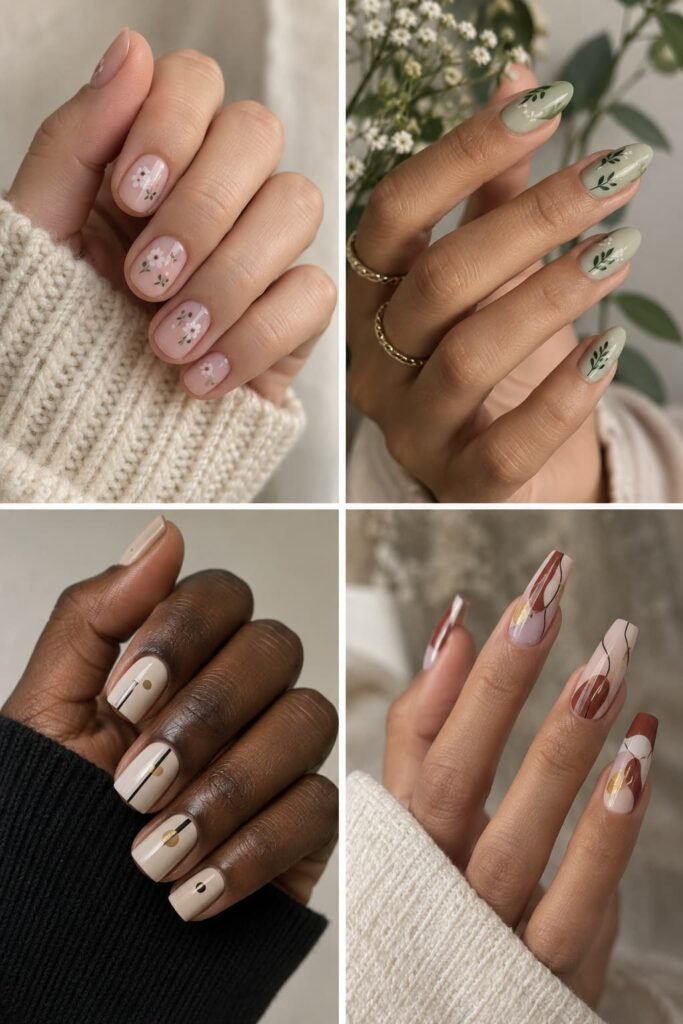
Nail shape and length affect how much surface area is available for a decal and how the design is framed.
The same decal may look different on short, long, rounded, tapered, or straight-edged nails.
Nail Decals on Short Nails
Short nails provide a more compact area for artwork.
Small flowers, stars, symbols, lines, or other compact motifs may leave more of the base colour visible.
A larger illustration can still be considered if it fits the available width and length, but the final composition may look different from the same design placed on a longer nail.
Decals on Almond, Oval, and Round Nails
Almond, oval, and round nails have curved outlines.
A small decal can be placed near the centre or along one side, while a longer motif may follow part of the nail’s curved shape.
The design does not need to follow the outline exactly. Placement depends on the decal shape and the amount of visible base colour desired.
Decals on Square, Coffin, and Longer Nails
Square nails have a flatter outer edge, while coffin nails usually taper before ending in a straighter tip.
Depending on the length, these shapes can provide room for wider artwork, larger illustrations, or several smaller decals.
Additional nail length creates more surface area, but it does not mean the design needs to be heavily decorated. A small accent can still create a restrained look.
Choosing a Base Colour and Finish for Nail Decals
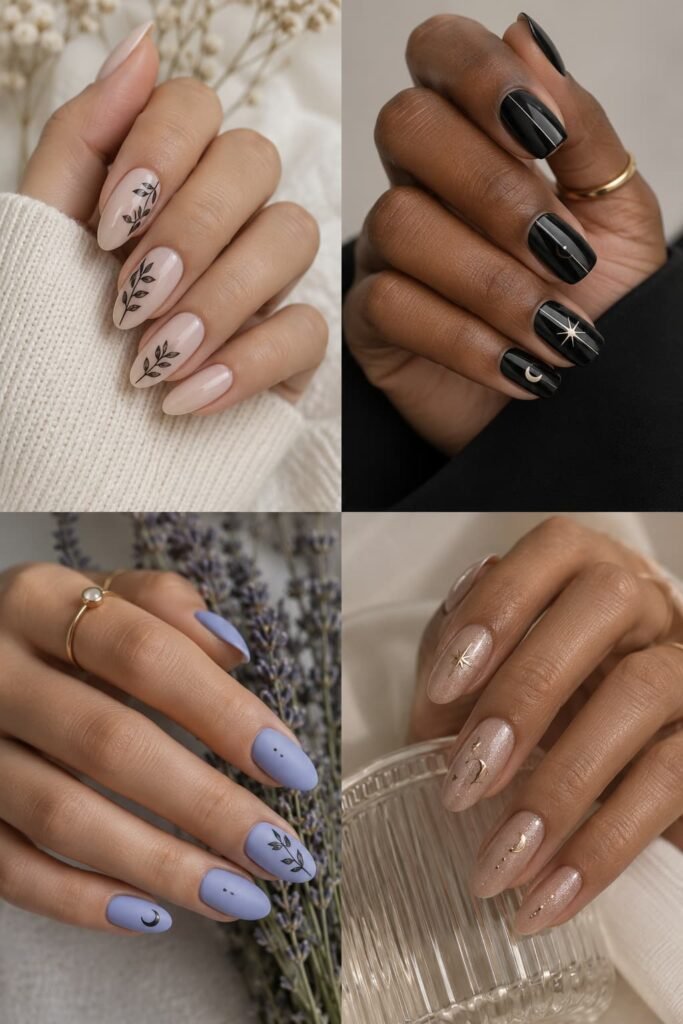
Base colour and finish can change how visible a decal appears.
There is no single colour that works for every design because decals differ in opacity, colour, size, and printing method.
Decals Over Light and Neutral Colours
White, nude, blush, pale pink, beige, and other light shades can provide a relatively simple background for many decal designs.
Transparent areas may be less noticeable over certain pale colours, while printed colours can remain easier to distinguish in some combinations.
The exact effect depends on the decal.
Decals Over Dark or Bold Colours
Dark or saturated colours can create stronger contrast with lighter decal artwork.
However, transparent sections or some lightly printed designs may appear differently over dark polish.
For readers considering a dark base, Black Nail Designs provides additional examples of how black can be combined with decorative nail art.
Glossy, Matte, and Other Finish Options
A glossy finish reflects more light, while a matte finish has less visible shine.
Using the same decal with a different finish can change the overall surface appearance without changing the artwork itself.
Metallic-looking or shimmer finishes can introduce additional reflection. Some people may prefer to keep the background simple when the decal already contains detailed artwork, while others may choose a more decorative combination.
Can Nail Art Decals Be Used With Different Nail Systems?
Some nail decal products are intended for use with regular polish, gel polish, acrylic nails, press-ons, or more than one manicure system.
Compatibility should be checked for the specific decal and the products being used around it.
Natural Nails and Regular Nail Polish
Some decals can be incorporated into a regular-polish manicure on natural nails.
Depending on the product, the design may be placed over a base coat, colour polish, or another compatible layer.
Preparation, placement, and finishing requirements should come from the relevant product instructions.
Gel Polish
Some waterslide and self-adhesive decals can be incorporated into gel-polish designs.
The exact stage at which a decal is placed can vary between systems. The gel manufacturer’s curing instructions should always be followed for the gel products involved.
A universal curing time should not be assumed from the decal type alone.
Acrylic and Press-On Nails
Decorative decals can also be used with some acrylic and press-on nail designs.
Placement and sealing depend on the decal and the surface being decorated.
If a decal is being added to another nail system, the instructions for both products should be considered rather than assuming that the same application method works in every case.
Common Nail Decal Application Problems
Wrinkles, bubbles, raised edges, and poor fit can affect the finished appearance of nail decals.
The exact cause can vary by decal type, nail shape, available space, and application method.
Wrinkling or Bubbles
Wrinkles can appear when a thin decal does not lie evenly against the nail surface.
With waterslide decals, folds, trapped moisture, or uneven positioning can affect how flat the design appears. Gently smoothing the decal before the finishing layer is applied may help create a more even surface.
A self-adhesive design can also sit unevenly if one section attaches before the rest has been positioned.
Nail curvature can make a difference as well. A large design may require more careful positioning on a curved nail than a small accent motif.
If a large decal is difficult to position within the available space, a smaller design may be another option.
Lifting Around the Edges
A decal that does not sit flat around its edges may remain more visible as a separate layer.
With adhesive designs, keeping the decal within the nail surface can help avoid having part of it extend onto the surrounding skin or beyond the nail edge.
The base surface can matter too. Some adhesive products are intended to be applied over dry polish, while others may have different preparation requirements.
A decal that is too large for the nail may also be more difficult to position without overhang.
If a finishing layer is required, it should be applied according to the decal and manicure-product instructions.
Choosing a Decal That Does Not Fit the Nail
Nail widths and lengths vary, so the same decal will not necessarily fit every nail in the same way.
A large illustration may fill most of a short nail while leaving more visible background on a longer nail.
Smaller motifs can offer more placement flexibility. A flower, star, line, leaf, or abstract detail might sit near the centre, side, base, or tip.
Some larger decals can be trimmed, depending on their design and instructions.
The artwork itself should also be considered. Cutting through an important part of an illustration can change how it looks, so choosing a smaller design may sometimes be a simpler option.
What Should You Consider Before Choosing Nail Art Decals?
Start with the decal type. Waterslide designs require a different transfer method from self-adhesive stickers.
Next, consider nail length and available placement space. Shorter nails provide less room for large illustrations, while longer nails provide more space for larger artwork or several smaller accents. Neither length is automatically better.
The base colour can affect how the design appears. Transparent or lightly coloured artwork may look different over a pale background than it does over a darker shade.
Think about the desired level of detail as well. One small decal may create a minimal look, while several motifs or a larger illustration can make the design more decorative.
Placement is another styling choice. Depending on its shape, a decal may sit near the base, centre, side, or tip.
Finally, check the product-specific instructions. Transfer, placement, sealing, compatibility, and removal requirements can differ between products.
Frequently Asked Questions About Nail Art Decals
Are Nail Decals the Same as Nail Stickers?
Not always.
Nail stickers commonly refer to self-adhesive designs that can be peeled from a backing and placed directly onto the nail.
The term nail decal is often associated with waterslide transfers, but it is also used more broadly by some sellers.
Because terminology varies, the application method is a better indicator of how the product works.
Do All Nail Decals Need Water?
No.
Waterslide decals need water as part of the transfer process.
Self-adhesive decals or nail stickers generally use an adhesive backing instead and do not use water to release the design.
The instructions should be checked because similarly named products can use different application systems.
Can You Use Nail Decals on Natural Nails?
Some nail decals can be incorporated into manicures on natural nails.
Depending on the product, the design may be placed over regular polish, a base colour, or another compatible surface.
Preparation and finishing instructions can vary, so the decal and manicure-product directions should both be followed.
Can Nail Decals Be Used With Gel Polish?
Some nail decal products can be combined with gel-polish manicures.
The placement and sealing process can depend on the decal and gel system.
Gel products also have their own curing requirements. Those instructions should come from the specific gel manufacturer rather than from general nail-decal guidance.
Do Nail Art Decals Need a Top Coat?
Many nail decal systems include a compatible clear or top layer as part of their application instructions.
However, this should not be treated as a universal requirement for every decorative nail product.
Waterslide decals, adhesive stickers, wraps, and other nail-art systems can have different finishing instructions. The directions for the specific product should determine what is required.
How Can Nail Art Decals Be Removed?
Removal depends on the type of decal and the manicure system around it.
A decal used with regular nail polish may follow the removal process specified for that polish system. A decal incorporated into gel, acrylic, press-on nails, or another manicure system may need to be handled according to that system’s instructions.
There is no single removal method that applies to every type of nail decal.
Checking the relevant product instructions is preferable to assuming that every decal should be peeled, scraped, soaked, or removed in the same way.